Register a birth certificate online in India easily at crsorgi.gov.in. Step-by-step guide, document checklist, and hassle-free process explained.
How to Register Birth Certificate Online in India at crsorgi.gov.in
If you’re here, you’re probably navigating the wonderful (and sometimes confusing) world of online government services. Let’s face it – getting any official document used to mean long queues, endless paperwork, and maybe a chai break in between.
But, thankfully, those days are mostly behind us. Today, we’re diving into how you can register a birth certificate online in India at crsorgi.gov.in ( crsorgi.gov.in जन्म पंजीकरण और मृत्यु पंजीकरण ऑनलाइन ), all without breaking a sweat (or the internet).
Why Do You Need a Birth Certificate Anyway?
Before we dive into the nitty-gritty of the online process, let’s talk about why a birth certificate is so important. Think of it as the ultimate proof of identity for your little one (or for you, if you’re catching up on this process).
Whether it’s applying for a school admission, getting a passport, or even proving your age for marriage registration, this piece of paper is your golden ticket.
Plus, it’s legally required, so you can’t skip it. And hey, who doesn’t want their official birthday to match their actual birthday?
Step 1: Visit the Official Website
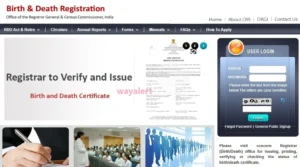
The first thing you’ll want to do is head over to crsorgi.gov.in. Don’t worry; it’s not one of those government websites that looks like it’s straight out of the early 2000s. It’s user-friendly (mostly), and you’ll find everything you need to get started.
Once you’re on the homepage, click on the “Login” option. You must first register if you are a new user. This part is super easy – just fill in your name, email, phone number, and a few other details. Don’t forget to set a password you can actually remember. (Pro tip: Avoid using “12345”. Seriously.)
Step 2: Register as a Citizen
Locate the “Citizen Registration” option after logging in. This is where you’ll create your account as a citizen to access birth registration services. Fill in the required details carefully because even a tiny typo can create major headaches later. Make sure the mobile number and email address you provide are active, as you’ll need them for OTP verification.
Once verified, congratulations – you’re officially ready to dive into the birth certificate registration process! Trust me, the hardest part so far was finding the right website.
Step 3: Fill Out the Birth Certificate Form
Here comes the meat of the process. On your dashboard, navigate to the “Birth Registration” section. Click on the form, and you’ll see a list of fields to fill out. The form asks for:
- The baby’s name (if you’ve picked one already).
- Date and place of birth.
- Parents’ details (like names, addresses, and ID proof).
- Hospital or midwife information, if applicable.
Before pressing submit, take your time and make sure everything is correct. A small mistake here could mean multiple trips to the municipal office, and we’re all about avoiding extra drama, aren’t we?
Step 4: Upload the Required Documents
Now it’s time to upload scanned copies of the documents. You’ll typically need:
- A discharge summary or hospital certificate if the birth happened in a hospital.
- Identity proofs of the parents.
- Proof of address.
- Marriage certificate (in some cases, though it’s not always mandatory).
Verify that the scans of your documents are clear. Blurry files are a surefire way to delay your application. If your phone camera isn’t cooperating, head to your nearest cyber café for some professional help.
Step 5: Pay the Application Fee
Depending on your state and municipality, there might be a small fee for processing the birth certificate. Don’t worry; it’s usually very reasonable (think less than your last food delivery bill). Online payment methods include UPI, credit/debit cards, and net banking. Once paid, save the receipt – it’s proof that you’ve done your part.
Step 6: Track Your Application
After submission, you can track your application status directly on the website. Just log in and click on “Track Status”. If everything’s in order, your application will be processed in a few days. You might even get an SMS or email update to keep you in the loop. How’s that for efficiency?
Step 7: Download or Collect the Birth Certificate
Once your application is approved, you’ll be notified to download the birth certificate directly from the portal. Alternatively, some municipalities may ask you to collect it in person. Either way, you’re just one step away from completing the process!
Tips to Make the Process Smoother
- Double-check documents: Before you start, make sure you have all the required documents ready. A little prep goes a long way.
- Use a stable internet connection: There’s nothing worse than losing progress because of a flaky connection.
- Save your login details: Write them down somewhere safe or use a password manager. You’ll need them for tracking.
- Keep an eye on deadlines: Some states require registration within 21 to 30 days of the birth.
Why Online Is the Way to Go
Gone are the days of running around government offices and bribing peons for faster service. Registering a birth certificate online at crsorgi.gov.in is not just convenient; it’s empowering. You’re saving time, effort, and maybe even your sanity. Plus, the satisfaction of handling it all from your couch? Priceless.
Wrapping It Up
So there you have it – everything you need to know about registering a birth certificate online in India at crsorgi.gov.in. The process is straightforward, and with a little patience, you’ll have that all-important document in no time. If you’re still feeling unsure, take a deep breath and remember: You’ve got this!
